Table of Contents
CAN-GC6 CANBUS Servo Controller
Features
- Position events.
- Optional external switch position sensors.
- GCA137 support for polarisation
- Interactive comfortable setup and merg CBUS FLiM compatible.
- Compatible 12VDC merg CBUS connector. (J3)
- Opto-isolation for feed-back switches.
- Individual direction-speed selection.
- 'Bouncing' option.
- Smooth running motor due to high resolution stepping.
The final board
LEDs, Jumpers & Connectors
| LED | Function | Aspect | Color |
|---|---|---|---|
| L1 | CAN activity | Random | Red |
| L2 | FLiM learning mode (PB1) | 1Hz | Yellow |
| L3 | CPU is running | Continuous | Green |
| L4 | Servo busy | 2.5Hz | Red |
| Jumper | Function |
|---|---|
| JP1 | 120 Ohm line termination¹ |
¹) A CAN bus must be terminated on both ends to get 60 Ohm.
| Connector | Function | remark |
|---|---|---|
| J1, J2 | CAN and 12V power | only needed if used in CAN-GC system |
| J3 | 'MERG' CBUS and 12V power | only needed if used in MERG Cbus system |
| S1..S4 | Servo 1…4 | |
| F1..F4 | External switch position feedback (2 inputs for each switch) | |
| ICSP1 | In-circuit serial programming | |
| GCA137 | Piggyback board connection for polarization |
Connection Servo's
Most servo's come with a connector which will fit on Servo 1..4 connector on the CAN-GC6.
The signal line (useally orange ) should be at the edge of the board.
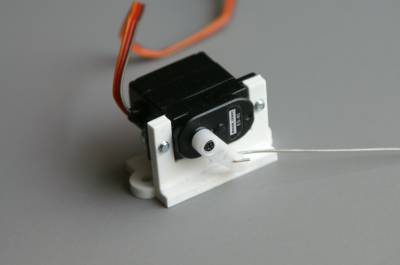
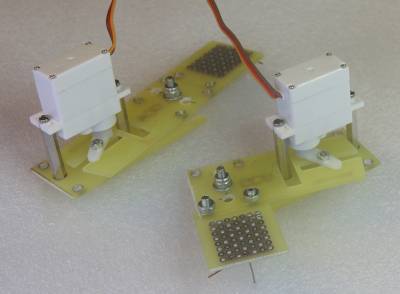
Mounting options for servo motor
 | |
| See http://www.rbs-modellbau.de/ | |
 |  |
| A nice mounting support is available from GCA. Sideways or in line movement is possible | The set contains all that is needed, incl. servomotor see GCA servo support ServoSet |
Connection limit switches
If you are not planning to use this option, F1..F4, U4 and U5 can be omitted.
F1..F4 are made for connection of limit switches, to feed-back that turnout is really on its desired position.
Switch should be on when position is OK
Connection should be made according this table :
| Connector | Turnout# | position | Connections |
|---|---|---|---|
| F1 | 1 | straight | C + S (1 |
| F1 | 1 | round | C + R |
| F2 | 2 | straight | C + S |
| F2 | 2 | round | C + R |
| F3 | 3 | straight | C + S |
| F3 | 3 | round | C + R |
| F4 | 4 | straight | C + S |
| F4 | 4 | round | C + R |
1) C = common, S = straight, R = round / turnout
See also here: Hardware feed-back
PSK header connectors
IMPORTANT NOTE !!!!!!
Some users seem to know better, and solder wires directly to the pins or the pc-board.!
That is totally unacceptable !!
Wires will easily break off, and cause a lot of damage in many cases.
So use connectors !!!!!
In order to ease making these cables, it is also possible to buy the necessary tool, to create the PSK cables.
The best wire to be used with PSK connectors is 0,25 mm².
This special plier is available for net price of € 20,00 if ordered together with complete kits. 
Just ask peter.
Setup
Servo sliders
| L | Left position |
| R | Right position |
| SpL | Speed left |
| SpR | Speed right |
The labels "L" and "R" are also test buttons. (7046+)
Polarization Relay
This options flips the polarization relay.
External sensor
Use the external sensor input for this servo instead of the generated event after reaching the wanted position.
Bounce
Bounce the servo slightly after reaching the end position.
Sensor
The Event Nr. to use for reporting that the servo is in position.
Usage
Shows the Rocrail object ID which is linked to this servo.
Short events
Ignore the event node number and compare the event number only.
Long events
For long events the BUS variable on the interface tab of sensors, switches and other objects is used to address the module its node number.
The address variable is equal to the one used with short events.
SoD
"Start of Day"
The servo positions will be reported at SoD event.
Node Nr.
Only for use with long events.
Save position
The servo positions will be saved in EEPROM after a Power Off message on CAN BUS.
Switch Setup
Single Gate
The switch interface option Single Gate must be set.
Hardware feed-back
CAN-GC6 is also provided with connections (F1..4) for hardware feed-back.
This is an extra option, to install a switch at both end positions of the turnout frog.
This drawing explains how to connect it.
Another possibility is the shared use of the circuit of the frog polarization. For this purpose, the frog is connected with the common terminal C = pin 2 and the two track polarities are connected with S = pin 1 and R = pin 3. In this case, the supply of the frog should not be linked over an occupancy sensor, because the current consumption of the optocouplers would simulate an occupancy of the switch. It should be considered that this kind of circuit give a reversed logic for the voltage at the optocouplers. So it's necessary that the not with the frog connected track polarity should connect to the corresponding terminal S or R.
Turnout feedbeck with the frog polarization circuit
Hardware
| The schematics |
| The pcboard with parts positions |
| Bill of materials |
| Gerber files |
| N.B. Only complete ordered kits will be supported! |
|---|
Development Tools
- MPLAB X v1.00
- C18 v3.40
- PICKit 3


