Table of Contents
Setup
Setup van een Module Ontwerp
- Analyseer alle modules en bepaal logische groepen.
- Ontwerp alle groepen en sla ze op in hun eigen bestanden.
- Leg de beschrijving van de samengestelde modules vast in een modplan.xml.
- Leg de rijwegen voor dit samenstel van modules vast in een apart bestand .
Basic
- Analyse all modules and define logical groups.
- Setup all logical modules independent, offline, in their own files.
Manual
- Compose an arrangement and describe this in a modplan.xml. See: Rocrail Wrappers
- Keep the routes for this arrangement in a separate file, or use Modular Connections.
Graphical
Features:
- moving modules with the mouse
- popup menu for rotating
- module connections
- adding and removing modules
- property dialog for modplan
- property dialog for module
Hints:
- Select with the mouse an empty grid to drag a module or to get the module popup menu.
- Editing Modular Layouts by GUI is only supported when there is a server connection; No off line edit possible.
- Most importand is to set a unique moduleID for every module!
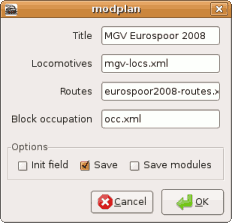
ModPlan Dialog
Title
Free text for the arrangement title.
Locomotives
The XML file containing all locomotives properties.
Routes
Optional routes XML file. When using connection it is probably not needed, but it can be used for defining routes which are not possible at the momentairy implementation of solving module routes.
Block occupation
This file is used before shutting down to store all block occupations.
Init field
Swap all switches at startup to get defined positions.
Save
Allow saving the moduleplan file.
Save modules
Allow saving the module files.
Module Dialog
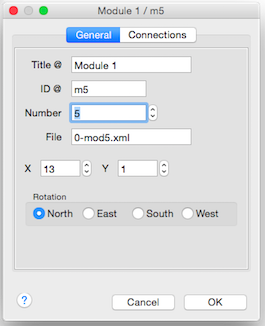
General
Title
Free text for the module title.
ID
Module ID which is a reference for all other modular actions. Be carefull to change this ID because it could make the module routes invalid.
File
XML File with the module definition.
X, Y
Module position in the arrangement.
Rotation
Which side of the module will be upper most is selected by the rotation option:
- North = 0° (equals the module without rotation)
- East = 90°
- South = 180°
- West = 270°
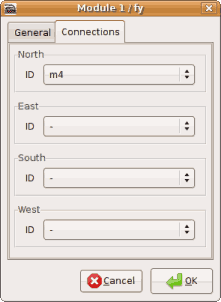
Connections
For an explanation see: Modular Connections

North, East, South, West
The side on which a module is connected.
Take care: This is the real side of the module, not the rotated one!
Example:
If the module is rotated to east, east side up, the connection side at the bottom of the module is west.
ID
The module ID which connect to the selected side.
From Scratch
With the Rocgui
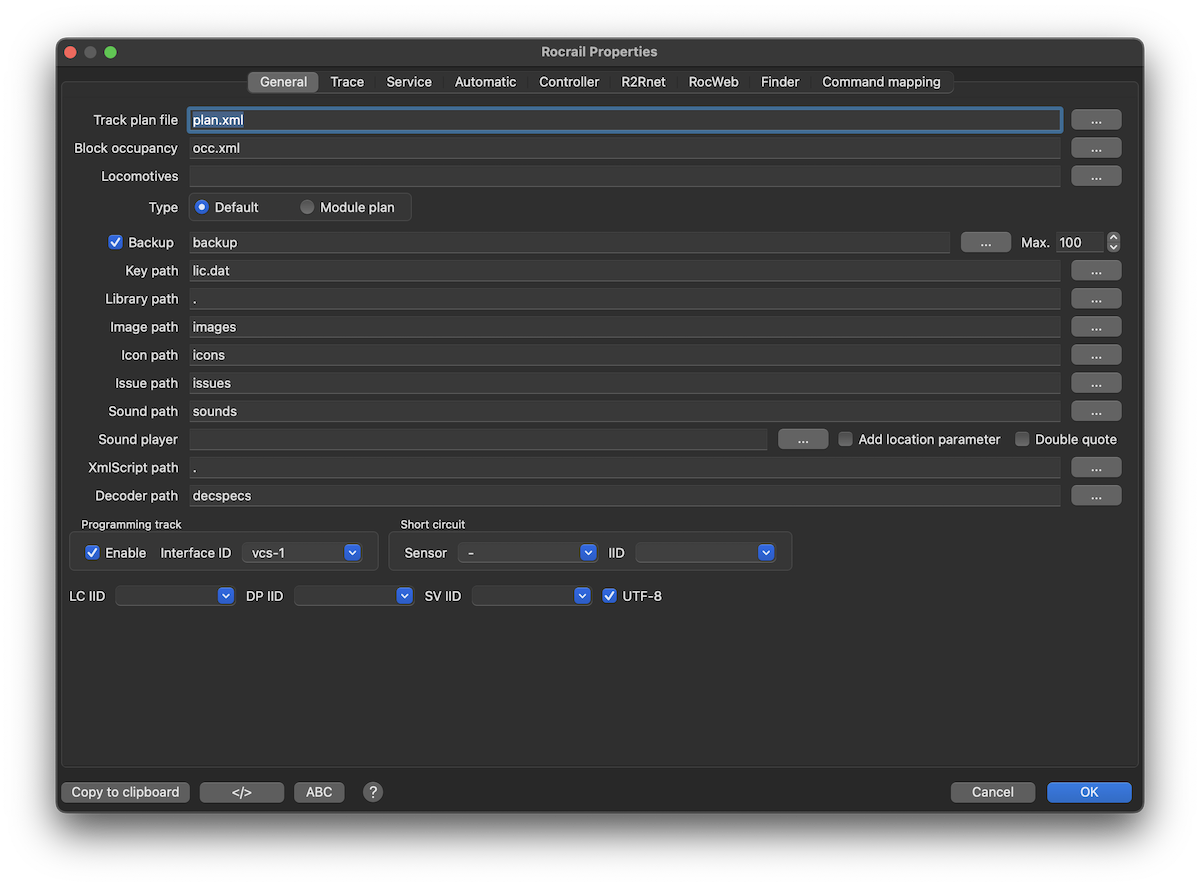
- Set the wanted file name for the ModulePlan and select the module plan type.
Make sure the file does not already exist. - Exit the Rocgui.
- Restart the Rocrail server.
- Add modules by right clicking in the Module panel and select the popup menu item Add Module.
- Find an empty spot in the module to drag it holding the left mouse button to another location in the Module panel.
- By right clicking this spot the module popup menu will occur with all options needed to configure and rotate the module.
Manually
To create a modular layout from scratch the default scheme for the rocrail server, plan.xml, must contain this:
<modplan title="My Modular Layout"/>
Module path
The rocrail server will get the full qualified path for new modules from the rocgui so both must share the same file system. In future version the rocgui will send the content of the new module to the rocrail server.


