Table of Contents
Quick Guide
- Before You Start | Quick Guide | Step-by-Step Tutorials
This page is a quick guide designed for the versed user
In case of any difficulties the Step-by-Step tutorial should be consulted.
Steps
Download
Install
Install the Rocrail software you just downloaded. Use these links for more information on how to install Rocrail for your operating system:
Connect the Command Station
Connect your Command Station to your computer. Use the guide that came with your Command Station to determine how to make the connection. If you are not sure, contact your manufacturer and read the Rocrail Wiki sections on command stations:
Start Rocview
Open a Workspace
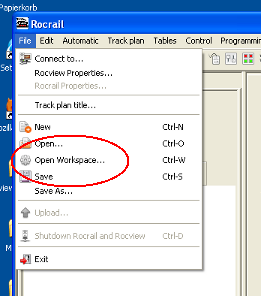
Select the "Open Workspace…" menu item found in the "File" menu:
Select the example Workspace which is included in the Rocrail setup:
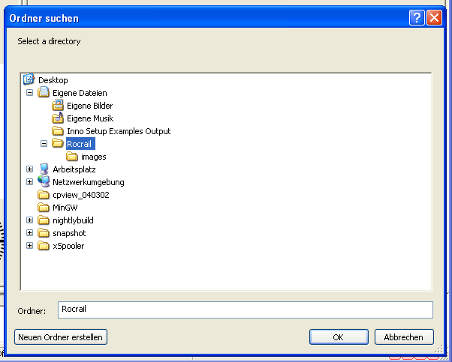
The default configuration is to run the Virtual Command Station setup. You should see a layout with 2 locomotives, the V200 and the E03. This virtual layout requires no actual connection to your Command Station or track, and will let you "run" two locomotives to see how Rocrail works.
Configure Rocrail for your Command Station
In Rocview, open the Rocrail Properties dialog: File → Rocrail properties. Switch to the Controller tab and delete the default command station (virtual). Add the correct command station for your layout.
Configure the command station by selecting it and clicking on the Properties button.
Restart
Shutdown the Rocrail server and Rocview.
Restart the Rocview Client, and open the Workspace again.
Test Your Setup
Use Rocview to turn the power on your layout on and off. Verify that you have track power, and that your Command Station's power indicator goes on and off.
Configure and run a Locomotive. Verify that you can run your loc manually forwards and backwards on the layout.
Troubleshooting
Read the Wiki to make sure you have your Command Station properly configured if you cannot turn the track power on and off.
Read the Wiki to make sure you have your Locomotive properly configured if you cannot run your Loc manually once it is set up.
Post in the forums if any of these steps do not work. There are many configuration issues that might make this fail, but Rocrail's members will help you get the solution for your problems.
Next Steps
Once you have gone this far, Rocrail is operational with your layout, and you can control the locomotives by hand.
Now you have to fine tune everything to get what you want from Rocrail.
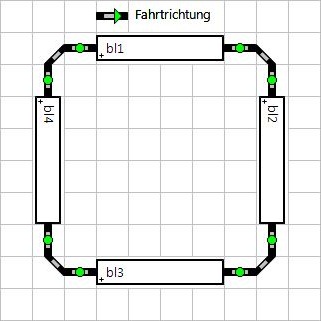
For the small demo we need three trains, four blocks and four sensors. Eight sensors would be better, but can be added afterwards if wanted.
This picture is only an example on how it can be defined.
Setup Locomotives
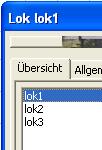
Open the Locomotive Table with the short cut Ctrl+1 and push „New“.
Set the ID on the General Tab and decoder address and protocol, when needed, on the Interface Tab.
The initial V-min could be too low for the locomotive so we set this to „20“ and V-max to „50“.
All other settings we leave untouched for the moment and repeat this for all locomotives we need.
Setup Blocks
Now we will setup, as shown in the picture, four Blocks and call them „bl1“ … „bl4“.
On the „Details“ Tab we check the velocity option „Min.“ and leave all other options untouched.

Setup Sensors
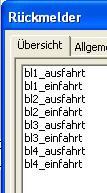
Also we will setup the shown Sensors, ID's (in our example like „bl1_einfahrt“, „bl2_ausfahrt“ and so on) and setup the address on the „Interface“ Tab.
To test the sensors we can let run one locomotive and check if they are functioning.
Setup Routes
Open the Route Table dialog and setup the four routes we can see in the example picture.
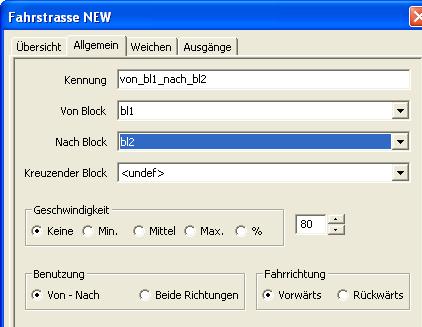
We need following routes:
- from Block 1 to Block 2
- from Block 2 to Block 3
- from Block 3 to Block 4
- from Block 4 to Block 1
Block Events
Detailed information on this topic.
This is the most important part: Processing sensor events.
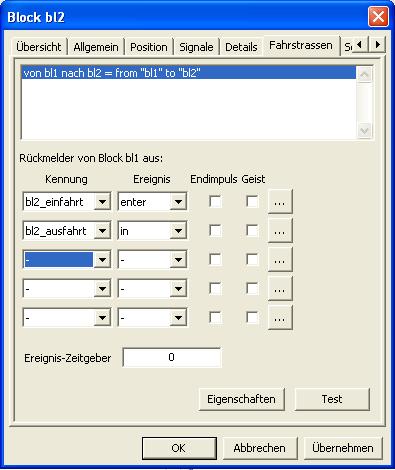
The events we need for this example are:
For that purpose we choose the Routes Tab in the Block properties dialog. Select one after the other of the four routes to setup the events.
- „enter“ = The locomotive enters the beginning of the sensor section.
The „enter“ event will reduce the velocity of the locomotive to „V-min“. (Depends on the Block details.)
- „in“ = The locomotive is now completely in the block.
The „in“ event will stop the locomotive if the next block is already occupied by another train and will wait until it comes free.
Use „enter2in“ if only one sensor has been setup for a block.
In this case the time between „enter“ and „in“ depends on the „Event Timer“ value.
Set Block Occupancy
Now it is time to set the locomotives in the Blocks. Make sure that at least one block remains un-occupied.
Use the right mouse button on the block symbol to set the block occupancy for every block except one with „Set Locomotive occupancy“ and select the wanted one from the list.
Run in Auto mode
Select from the „Automatic“ menu the „Auto mode“ item.
In the same menu select „Start all locs“.
If nothing happens make sure the track power is set on.
