Table of Contents
RocNetNode RocDisplay


![]()
![]() Content → Command Stations → RocNet
Content → Command Stations → RocNet
-
-
- GCA-Pi01 | Pi01CAN | GCA-Pi02 | GCA-PI03 | GCA-PI04 | GCA-Pi05 | GCA-Pi06 | GCA-PI07 | GCA-PI08 | GCA107 Relay board | RocDisplay | Fast Clock
| Idea and support | Peter Ploiner |
| Hardware, Firmware, Documentation and copyright | Walter Sax |
| Rocnetnode revision | 2.0.9927+ |
| Rocrail revision | 2.0.9928+ |
| 2021 the project was stopped, we suggest to use WIO |
|---|
Introduction
The Idea behind this project was to build a display connected to RocRail for displaying on the platforms current train informations (target, departure time, clock,…)
Micro displays in size, 26 x 9 mm, to fit for H0 are now days available and could be used for Dynamic passenger information.
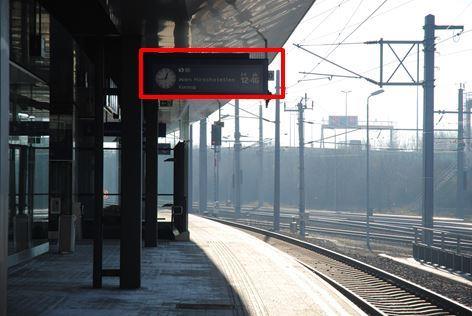
The red box in the picture shows approximately the display size in compare to the original in Austria for example.
First attempt on a H0 fine scale platform
Text objects in Rocrail have an Interface Tab which can be used to address a certain a display which will be used after an update event to send the new text.


The implementation allows to adapt many possibilities for different country specific needs. Adaptions are possible directly from RocRail with control characters in the text.
Some examples for individual adaption:
- Invert Displays
- Analog clock left/right/hide
- Rotate text
- blinking text
- brightness
- Display on/off
- many other options…
A detailed description of all settings and possibilities can be found in the technical documentation.
Components
The RocDisplay unit is a set of three different components.
The controller is attached to the RocNetNode.
The display backplane is attaced to the controller. Up to 4 displays per contoller are possible.
The display it self. It's mounted on the backplane.
With jumpers J1/J2/J3 and J4 it is possible to select the address of the controller.
This makes up to 16 contollers possible on one bus.
Table of possible address settings of the controller:
| J1 | J2 | J3 | J4 | Controller address |
| X | X | X | X | 80 |
| X | X | X | - | 81 |
| X | X | - | X | 82 |
| X | X | - | - | 83 |
| X | - | X | X | 84 |
| X | - | X | - | 85 |
| X | - | - | X | 86 |
| X | - | - | - | 87 |
| - | X | X | X | 88 |
| - | X | X | - | 89 |
| - | X | - | X | 90 |
| - | X | - | - | 91 |
| - | - | X | X | 92 |
| - | - | X | - | 93 |
| - | - | - | X | 94 |
| - | - | - | - | 95 |
where X is jumper set and - jumper open
The two status LED indicate the status of the controller.
If the yellow LED is blinking, the controller is in the bootloader programm. After power on it waits around 5 seconds in bootloader and then it start the normal programm.
During an update of the Display content the yellow LED is off. In this time the controller can't accept any other commands. Normaly it's as short as a little flash.
The red LED indicates traffic on the Bus addressed to the RocDisplay controller. Normaly it flashes short if a command is send.
The Displays are mounted on a backplane where all neccesary SMD components are placed for operation.
On one backplane it's possible to mount two displays, so that a double sided passenger information is possible. Every Display need it own port on the controller.
To avoid any interrupts in the communication between the RocDisplay controller and the Displays, the wires to the displays should be as short as possible.
Wire lenght about 40cm should be possible.
I2C
Unfortunately the I2C hardware used in Raspberry Pi has a bug. This bug don't allow slave devices to stretch the clock signal.
For normal use of RocDisplay there is no problem, the I2C standard settings are valid for displaying text from RocRail.
The only thing is that reading of the Settings is with the standard I2C baud rate not possible.
A workaround is to set the I2C bus speed temorary to 400kHz and after the settings are done back to 100kHz.
To make it easier for users a config tool is available that set the necessary setting for reading and configure all RocDisplay settings on the controller.
Links to the description of the hardware bug:
http://www.advamation.de/technik/raspberrypi/rpi-i2c-bug.html
https://github.com/raspberrypi/linux/issues/254
Setup
If RocDisplay controllers are connected is visible on the Rocnetnode Options tag:

Text Format
The text format to control the displays is documented in the "Technische Beschreibung" (DE).
Display commands are between braces.
Example
{EB0F3}5 0 \{F1} Kurz Zug{L1}Rekawinkel{L0T1} {B8L1}04:48{P}
Flash the logo for 'S-Bahn' and 'Regionalzug':
{EJ1B0F3}4 0 \{F2} Kurz Zug{J2B2F3}4 0 \{F2J0L1F0}Wien FJB{L0T1F2B10L1F2}16:23{T0P}
For this example the depart time column must be deactivated:
{EF1} Zug Fährt durch!!!{L1F0J1[ BITTE][ ZURÜCKTRETEN]P}
Files
- RocDisplay Technische Beschreibung V1 (German language)
- RocDisplay Technical Description {English Translation}

