This is an old revision of the document!
Table of Contents
Step-by-Step Tutorial
- Before You Start | Quick Guide | Step-by-Step Tutorial
The Gateway to Rocrail
About this tutorial: Alls steps necessary for a successful start with Rocrail will be described. These steps should be completed in the sequence presented as they build on each other.
Overview:
- 1. Basics - Downloading and installing Rocrail, exploring the wikidemo plan
- 4. Configuring the first Locomotive
Rocrail can now control locos on a layout. Tracks, switches and signals are added to the track plan in the next steps:
- 5. and 6. Editing a track plan and Basic objects of a track plan - Tracks, switches, signals
The layout is now fully controlled by Rocrail. Missing objects for automatic mode and its configuration follow in the last steps:
- 7. Prerequisites for automatic operation: Blocks, sensors and routes
- 8. Driving trains in automatic mode: Starting of locos, setting destinations, random automatic, schedules
- 9. Additional steps and possibilities, briefly mentioned
Further Tutorials
- Language Versions (click on flags to access pages):
 Please note: This tutorial is based on an unaltered first-time installation of Rocrail. Please note: This tutorial is based on an unaltered first-time installation of Rocrail. If changes of settings were made prior to reading this instruction success is not guaranteed! A simple de-installation / re-installation of Rocrail will not help in this case! See footnote1) |
Preface
This page aims to facilitate the first steps of beginners especially. It will guide the user from software downloading and installation through adding of locomotives and the creation of a track plan to a fully automatic control of the layout. By this it may offer valuable suggestions even to the advanced user.
This tutorial is kept as general as possible, i.e. it should apply equally to all operating systems and command stations. Thus, dialogues and settings pages will, depending on the operating system and personal settings, eventually look slightly different from the figures presented here. The contents remains the same, though.
An explanation of settings of all command stations supported is beyond the scope of this general introduction. The steps necessary to set up your individual command station are found on the wiki page of the respective command station.
Tips Using Wiki Pages
- For quick navigating on large pages use the Table of Contents in the top right corner of each page
- Printing of wiki pages is usually done easily using the print function of the browser. If possible, the scaling should be set to "shrink to page size", "fit to page" or equivalent. (However, be careful there are a lot of pages.)
Getting Help
- First of all: Read the Wiki! There is no classical user guide available. All information is in the wiki. Once familiar with this type of instruction it will be of great help.
- Got stuck? Feel free to ask the Rocrail Forum! There are many people from around the world willing to help with beginner and advanced questions.
- Please,
- use the correct language forum (currently available: English, German, Dutch, Italian, French)
- use an appropriate sub forum
- use a significant subject which describes the problem ("I have a problem" is not a good subject…)
- provide the Rocrail files. This is very easy using the built-in Create an Issue function
- once the problem is solved mark the topic as solved.
1.0 Basics
This section describes the very basic steps: Downloading, program installation, starting Rocrail for the first time and learning the concept from the wikidemo track-plan.
1.1 Download
Rocrail can be downloaded from the download portal (all operating systems).
1.2 Installation
 If the installer offers the option, Wiki plan (not Demo plan) should be selected to be installed. If the installer offers the option, Wiki plan (not Demo plan) should be selected to be installed. |
OS-dependent information is found here (return to this page after the software was installed and proceed with section 1.3):
1.3 The First Start
Rocview (not Rocrail!) is started from the start menu or the place where the OS holds the program links.
If Rocrail was installed using the ZIP installer (Rocrail ZIP), the folder where the unzipped files are located has to be opened instead. Then with double-click on the file desktoplink.cmd2) a link on the desktop is created3). The icon is called Rocview. Double click on this link / icon to start Rocview.
Note: It is important to always start Rocview using the automatically created icon in the start menu or the desktop shortcut created according to the above procedure, otherwise dependencies will not be resolved correctly.
Rocview opens and two pop-up dialogues shows up:
The one shown on the left is the Info dialogue. It appears only at the very first start of Rocrail. The terms and conditions have to be accepted and confirmed in order to use the program.
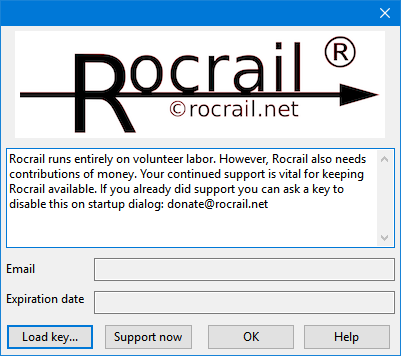
The dialogue on the right is the Donation Dialogue. It will appear every time Rocview is started as long as no donation key was loaded. The window is closed by pressing OK.
Note: Rocrail is developed and maintained entirely on volunteer labour. However, some money is needed to run the project, e.g. for purchasing hardware for testing purposes and to cover other expenses like domain and server hosting.
It is thus left to the user to make a small contribution as a donation if the program should be liked and be used in the long term.
The pages Donation Dialogue and Donating inform about how to make a donation.
After closing the Donation Dialogue, Rocview is displayed in the language specified by the operating system.
Tip: If this tutorial is not available in the desired language it may be wise to stay with the English user interface for the time being as the following explanations are based on screen-shots from the English GUI.
The language can be changed by choosing Language from the View menu and the desired language as shown on the picture below.
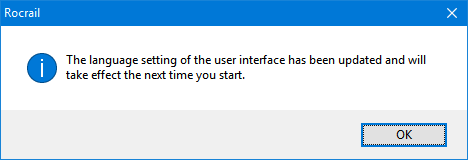
A dialogue appears which is confirmed by pressing OK.
Rocview has to be closed and restarted again, so the changes can take effect.
A fresh, empty Rocview looks like this:
Tip: If a colourful menu is desired the appearance of Rocview can be changed by performing the following steps: From menu File → Rocview Properties… is selected. Option Gray icons (bottom middle column) is deactivated. Rocview is closed and restarted again.
Note: This instruction will show figures of both settings for the time being. There are no functional differences using the one or the other design except for the zoom handling (which will be described later).
To get an impression of what Rocview looks like with a loaded plan, one of the two demo plans can now be opened:
* 1. From the menu file select the item Demo workspace .
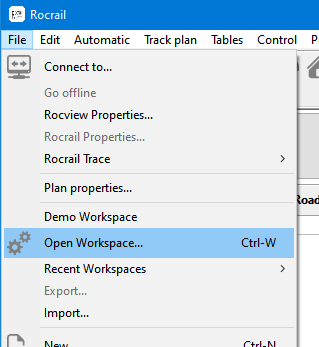
* 2. From the menu File select Open Workspace and then open the folder “wikidemo” in the dialog box that opens.
By opening a workspace Rocrail (the server) and Rocview (the client / graphical user interface) start with a common connection to control the model railway layout.


